NOTICE: These are tech pages explaining how I did these mods to my bike. In almost every case - |
|
|
On-Board Charger
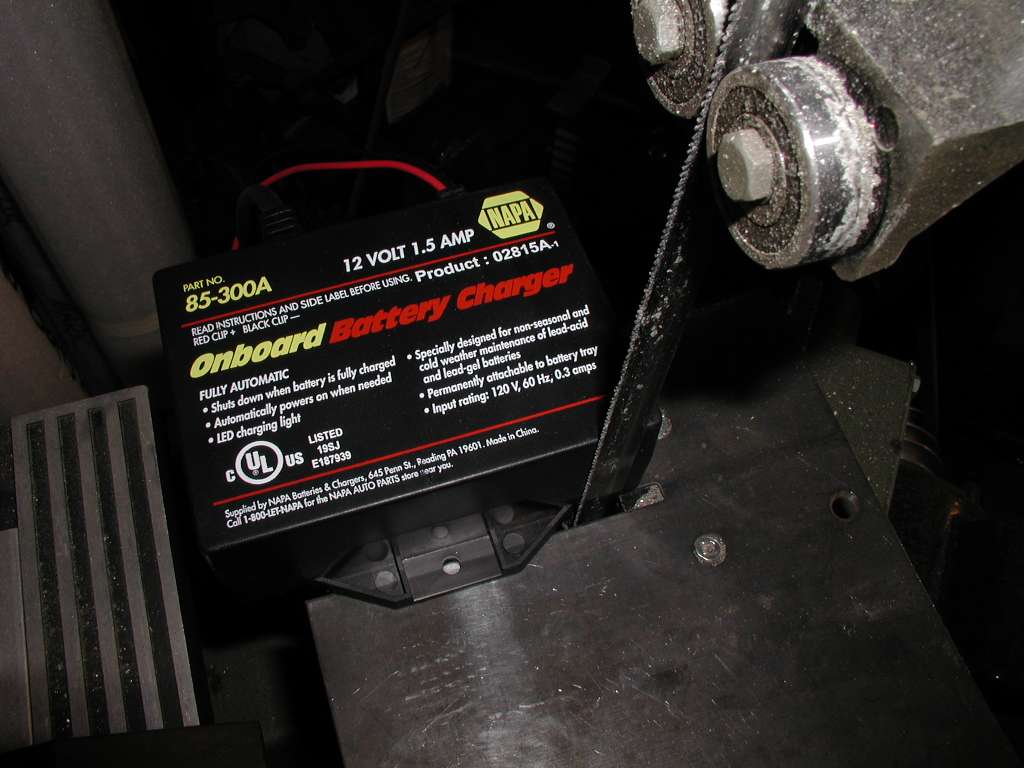
- 1.5 amp Automatic Onboard Battery Charger NAPA P/N 85-300A
- wire ties
- two washers
- hacksaw
- screwdriver
Rationale
You're camping in a state park with your buds, grilling steaks and jammin to ZZ Top on your Rio Volt - Blaupunkt 200 watt MP3 sound system. A beautiful night under the stars, good food, good friends, good tunes. The night winds down and you doze off to the crackle of the campfire and a coyote howling in the distance. Morning comes, lotta miles today, break camp, load up and fire 'er up.
CLICK.
DOH! "Anybody got jumper cables?"
Next time you'll be prepared with this mod.
Cost
$37.07 at NAPA. Not much else needed.
Time
1 hour if you don't have to move stuff outta the way like I did.
Materials
Tools
Process
The charger is just a little too big to fit in front of the battery which is mostly unused space, and the only place I have left to put anything like this, without making a special bracket. There is no need to screw it to the battery box - once you get it in front of the battery, it's not going anywhere. I cut off the mounting flanges with a bandsaw so it would fit in the space.
 |
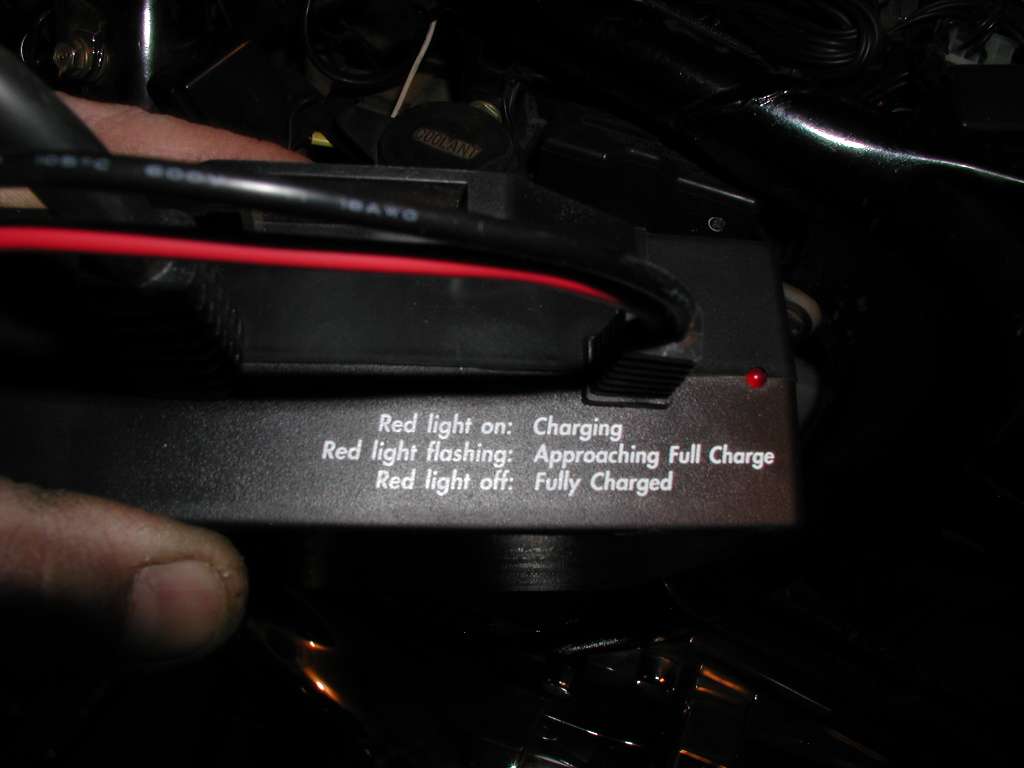
You might want to position it so you can see the LED:
 |
I had moved all the stock fuse blocks out from under the right cover, in front of the battery, to make room for my compressor. Now I had to move them again. I put them back under the right cover and wire tied them in place (wire ties - best thing since Velcro - Deerslayer is held together with wire ties and Velcro). It was a tight fit with the other stuff I have in there. I ran the 110v. plug wire so it's under that cover, and connected the +12v. lead to the buss on my new fuse block, instead of to the battery, and the ground to one of my existing ground screws. They provide 2 ring terminals on the wires, with the idea of connecting them to the battery cables. That's what you need the washers for. Of course I removed their crimped on ring terminals and soldered on my own - I don't trust crimp fittings.
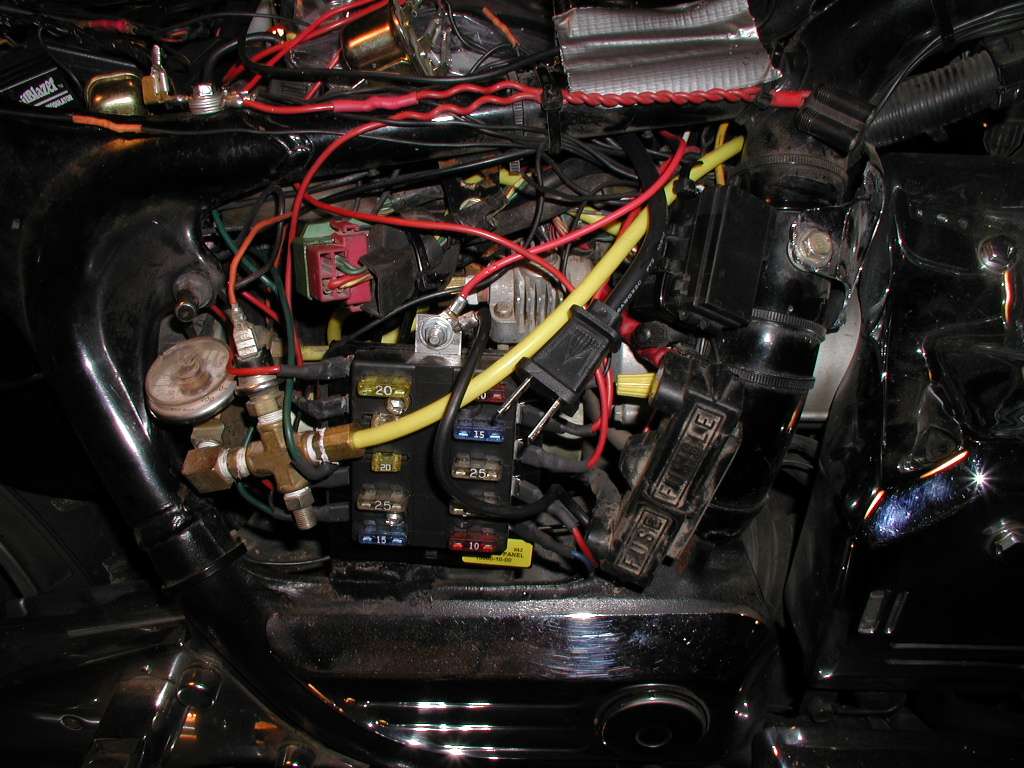 |
Here's my placement of the charger:
 |
The charger is completely out of the way, and waiting for me to need it.
 |
Use
I picked up a light duty 1500 watt 50 ft 2-wire extension cord from Ace hardware and put it in my tool bag - I figure I should be able to
park at least that close to an outlet in a campground with utilities, or at my motel. This charger will also maintain my battery with less hassle than hooking up my big charger, not to mention charging at 1.5
amps is prettty slow but it's recommended to preserve the life of the battery, compared to fast chargers.

All technical mods described here are merely reports of what I've done. You may attempt to replicate them at your own discretion and risk if you choose. Horseapple Ranch, LLC and Mark Tobias will in no way be responsible for the results of your attempting to perform these mods on any motorcycle, regardless of the outcome.
All content on www.horseapple.com copyright 1999-2006 Mark Tobias except "Riders Say", "Dyno Day", Vallejo and Shop Manual and Alternator Review pages, and SWF and MP-3 files and
their graphic icons, and any content specifically attributed to another author.
All rights reserved.