NOTICE: These are tech pages explaining how I did these mods to my bike. In almost every case - |
The Rood Saddle Mod
"Process" by Dr. Marty Rood
Remainder of article by MarkT
Upholstery by Stan at Boulder Auto Interiors
Rationale
The average Valk rider, according to informal surveys conducted a couple of years ago, is in his late forties. The reason that older folks need to carry their own cushion to the ball game, is that age results in a loss of muscle mass, including where we sit. So we are sitting more on our bones and veins, and less on natural padding. Some motorcycle seats, including the stock Valkyrie seat, appear to be designed to feel good on the showroom floor - nice and soft. Problem is, that softness results in the foam applying pressure to your veins & arteries, which shuts them down and results in your butt and privates taking a snooze, for some of us, in short order (about 20 minutes, for me). Damned uncomfortable. And disastrous for your social life - it's been proven this circumstance with bicycle riders can result in impotence.
Two things need to happen with a seat to eliminate this problem:
- The seat must be correctly shaped to support more of the buttocks and less of the crotch (imagine a tractor seat instead of a pillow), and
- The seat must be fairly firm to provide that support without adding pressure in the crotch area where the aforementioned veins are that can cause the problem.
- Stock seat
- Motorcycle seat pad. The pad in the photos is from Wanner Associates, but Charlie no longer wants to provide them for others to install. (In fact if you talk to him as I did, he'll tell you not to follow these instructions, you won't like the seat. I liked the seat, until I got a great deal on a Mustang, I haven't heard any complaints yet from the folks I did this mod for; only from Charlie who is in the seat mod business.) Travelcade seats may be a source for the pad.
- Upholsterer to provide materials: vinyl, staples, nylon line
- long thin blade, sharp knife
- single- side razor and handle
- pliers
- magic marker
- tape or ruler
The Rood saddle mod is comprised of removing the stock seat cover, cutting the foam so it's shaped correctly, installing a polymer type pad with a light foam cover, and recovering it professionally.
Cost
About $130-$140
Time
A couple of hours, plus the uphlosterer's time
Materials
Tools
Process
Here's Marty's instructions that I followed:
"Don't do any cutting until having read all of this missive. The first things which one must do are further down the page.
"Basically, there are two musts that one needs to keep in mind. First, and most important is the 90 degree angle which has to be cut out at the rear. The stock seat has a gradual slope (putting
maximum pressure right at the tail bone) to the bead at the rear of the seat. This should be the starting point from which to cut vertically downward through the foam to the supporting frame. It
should follow the contour of the rear of the seat (and your butt); tapering to a shallower depth as one comes out towards the sides of the seat (in a curved line following the natural coutour of the
rear of the seat at just in front of the junction with the top of the rear). Then a horizontal cut should be made to remove the foam in such a manner as to merge with the vertical cut.
"The second most important "must" is that the horizontal part of the seat has to be slightly concave. Your ass is convex; therefore, in order to keep the pressure evenly distributed, the end resulting
foam contour must be concave (yes, that means removing even more foam - don't worry about it). I stress this because there are very few stock or aftermarket seats which are concave. Corbin is an
exception in that they have a concave shape; but they do not compensate for the vertical junction between the butt and the back of the tail bone, or spine.
"There is another consideration when seemingly hacking all of this foam out of the seat (scary sounding procedure - but look at it this way, you certainly can't live with the stock seat the way it is,
can you?). Many riders suffer from "crotch anesthesia" after logging a few miles on board. What really helps this from occuring is, when doing that horizontal concave contouring; extend that
concavity forward enough to include the area directly behind the scrotum. The pressure on the arteries directly behind the scrotum is what stops the circulation in the whole crotch area, thereby
causing "numbness (or lack of circulation).
"At no time during this foam removal procedure should the foam on the borders (or sides) of the seat
be touched. The shape of this "cutout" should be dictated by the shape of the gel pack which is going to be placed inside of your cutout. This means that your first job is acquiring a gel pack which
is slightly smaller than the top of the seat, before you start cutting. There are two kinds: one is a "gel pack" and was designed for chronically bedridden patients to make them the most comfortable
and to reduce "bed sores". The second kind is made of the same material which coutours to differing
pressures such as the "flow" material in ski boots (for instance). I know of one outfit which sells this in the form of ½" thick seat pads and this is what I would recommend for maximum comfort. The
only problem is I don't know, off hand, who, what, or where to send you to get it. I had a one man vendor (in a small trailer) put one of these lesser known pads in my Gold Wing, and it was
unbelievably comfortable (I had it done at Americade last year - the vendor is at all of the major rally's).
"Using your gel pad as a template, mark the foam with a felt marking pen around the periphery of
the gel pack. This will be the borders where you will remove the foam as described above. Keep in mind that the rear of the pad has to end at the vertical cut towards the rear of the seat. After you
have removed the foam (it doesn't have to be very even) from the inside area , following the contours (described above) to a depth of at least ½" (or the thickness of the gel pad). The gel pad
should fit inside your cutout with none showing above the edges, and following the concave contours already described. The rear of the pad should fit to the vertical foam cut and not bend up at the rear.
Take it to a boat or custom upholstery shop and have them put a ½" foam over all of your work including the edges of your cutout. The reason for this is so the seat won't retain heat when left out
in the sun for awhile. From what I understand, these gel pads retain heat like you wouldn't believe. Pick out a textured upholstery that you like (black and looking like Corbin's stock vinyl is what I
picked). Then give the instructions to put a crease at the bottom of that 90 degree junction at the rear of the seat which will permamently stay. The way a good upholsterer will do this is by drilling
holes in the seat frame corresponding to the bottom of that crease. He will then sew a heavy nylon string from the seatcover all the way to to the underside of the seat through the drilled holes and
then tie it there. When done, with beading on the periphery, it looks really trick.
"Contrary to popular opinion, a "soft" seat is not comfortable. It merely allows for any pressure
points to go unnoticed for a few miles further before "butt fatigue" sets in. Soft foam seats also allow excessive pressure at unwanted points such as those arteries behind the scrotum. I have found
that firmer, correctly contoured seats are more comfortable all day long day after day. Don't look for softness. Look instead for a firm equalization of pressure for extended comfort.
"One last thing: The idea of getting an impression of one's butt is assuming that copying that contour will give the ultimate comfort. If that were the case, then the contour of the stock seat
would be quite comfortable. The reason why it isn't is because of the internal hard and soft parts inside one's Gluteous Maximus. Even though there are really no 90 degree contours in one's ass, due
to the tailbone pressure in that particular area; that angle is very necessary to not get a case of the dreaded "tail bone bite" which can make even sitting in an easy chair miserable for a couple of days
after discovering it during a long day's ride on the Valk."
"To get a better impression of what that "wraparound" 90 degree junction at the back of the Valk
seat should look like; take a look at any 1500 Gold Wing seat and you will see a taller version of that 90 degree junction. The only thing to keep in mind is that there is NO upswing contour from the
flat horizontal to the 90 degree vertical where your tail bone sits. When you have the appropriate sized gel pack (the large one is correct as the OEM Valk seat really is quite large); take the
seatcover off the Valk seat, center the pad on the seat, and you will immediately see where to start marking the rearmost cutout for that 90 degree vertical. This will be the most important place to
start. The stock seat is "bordered", or "framed" by ~3" foam borders. These should be left intact so
as to retain the stock shape and support at the peripheries. It's really pretty hard to make a mistake after looking at it as long as you keep these two most important ideas in mind - the 90* junction
and the seat concavity. I carved out the OEM foam at the centerline in the rear all the way down to the plastic frame in order to create that concavity as well as make enough room for the gel pad to fit
inside of the peripheral borders of the stock foam . Don't worry about doing this as it's needed to get the correct contour and you will never feel it through the gel pad and subsequent ½" light foam
insulating cover over the gel pad. You will only feel it in the finished product if you haven't removed enough foam right where your tailbone sits."
Well, I rode on this seat for several months before I replaced it with a super deal on a Mustang. It took a month or so to break in, then the butt sleepage problems were OVER. I could ride this seat
for hundreds of miles without tiring. It is FAR more comfortable than the stock seat, and it is quite a bit firmer. It's about an inch lower than stock. I think it looks pretty good, too.
Your stock seat minus the cover. Note you can see where the bead indents the foam.
Dry polymer pad. Center on seat so if the back were flat, it would line up where the rear bead is on the back of the seat. Trace around the pad with a marker.
Cut vertically around the pad. On the sides and front, deep enough so the pad will be completey below the edge of the foam, plus some depth for the pad's foam cover - this was 3/4" for my 1/2" pad. On the back, cut straight down to the plastic pan in the middle - around 4". Taper the depth of that cut upward to the sides' 3/4" depth.
Remove the foam. It needs to be deepest in the center, back, with another deep place to eliminate seat pressure in the crotch area. (Yes folks, both sexes.) It works well to make two parallel vertical cuts from center rear to front an inch apart, tapering upward in depth, then remove that inch wide strip of foam. Then a cut can be made from the perimeter to the center while pulling up on the foam, using the depth of the center cut to get a taper in depth to the center. I used a 10 inch, razor sharp flexible blade (non-serrated bread knife). We are going for a concave shape to cause support to come from the buttocks, and no pressure on the crotch area.
Half the foam removed. Note how it is deepest in back at the center - it's all the way down to the pan at the back of the cut, and tapers shallower towards the front, and towards the near side.
Looks a little rough - doesn't have to be really smooth, just symmetrical. Notice the extra foam removed as a "crotch pocket". This will prevent "crotch anesthesia". Don't worry about removing too much in the center. Don't remove from the sides except as needed to get the pad flush.
The pad and it's cover in place. Time to visit the upholsterer.
Since we're making a concave seat, the cover needs to be pulled down with heavy nylon thread, fastened to the pan, in the back where the crease is...
and in the front, where the "crotch pocket" is.
Note the concavity, the "crotch pocket", and the removed "tail bone biter"
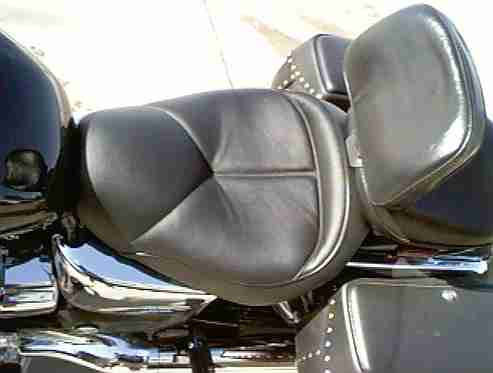
VERY comfy - fits my butt like a glove - and cost a total of $140.
Disclaimer
Sorry folks, this is a do-it-yourself article only. Meaning, I can't do this mod for you, since the source for the pad used here has declined to continue to provide them for others unless he does the labor, and I'm not in the seat mod business so I can't take the time to re-prototype a different seat pad.
Good luck doing it yourself. I can point you to another upholsterer in the Denver area who has a pattern set up for this mod, if you don't want to deal with a local upholsterer.

All technical mods described here are merely reports of what I've done. You may attempt to replicate them at your own discretion and risk if you choose. Horseapple Ranch, LLC and Mark Tobias will in no way be responsible for the results of your attempting to perform these mods on any motorcycle, regardless of the outcome.
All content on www.horseapple.com copyright 1999-2006 Mark Tobias except "Riders Say", "Dyno Day", Vallejo and Shop Manual and Alternator Review pages, and SWF and MP-3 files and
their graphic icons, and any content specifically attributed to another author.
All rights reserved.